Version 2 - Last Updated: 09 Jun 2025
Tips on using the portal
Exporting learner data to Microsoft Excel
Step 1: Creating an export file on the portal
Learner data: applications
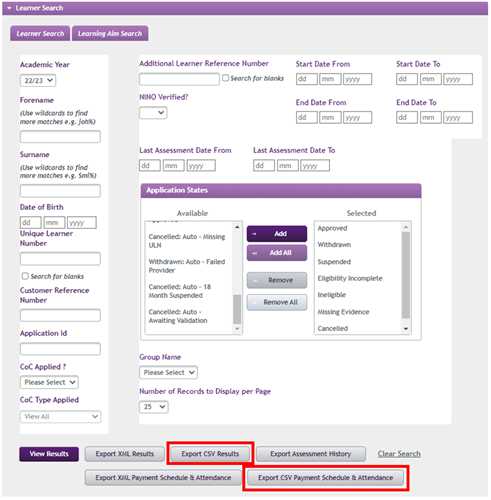
- Go to the Application Information Service tab.
- Select Learner Information Home and then Learner Search.
- Go to the Application States section of the page. Use the Add or Add all buttons to choose the application states you need.
- Set the parameters (such as academic dates and period) for your report.
- Select Export CSV Results or Export CSV Payment Schedule & Attendance, depending on which you want to export.
- The upper part of the page will darken. Scroll down to Results Export and enter a name for your export file.
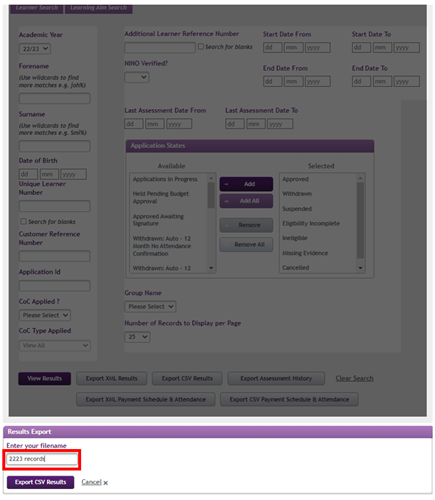
- Select Export CSV Results to generate the export file in csv format.
Learner data: changes of circumstance
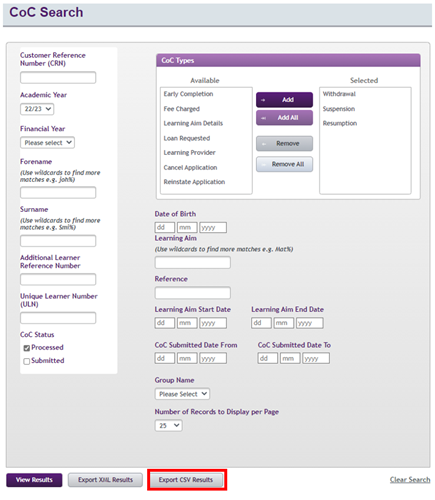
- Go to the Application Information Service tab.
- Select CoC Home and then View CoC.
- Go to the CoC Types section of the page. Use the Add or Add all buttons to choose the Change of Circumstance (CoC) types you need.
- Set the parameters (such as academic dates and period) for your report.
- Select Export CSV Results.
- The upper part of the page will darken. Scroll down to CoC Results Export and enter a name for your export file.
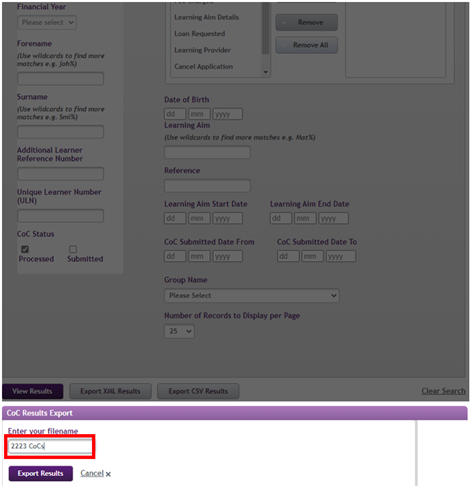
- Select Export Results to generate the export file in csv format.
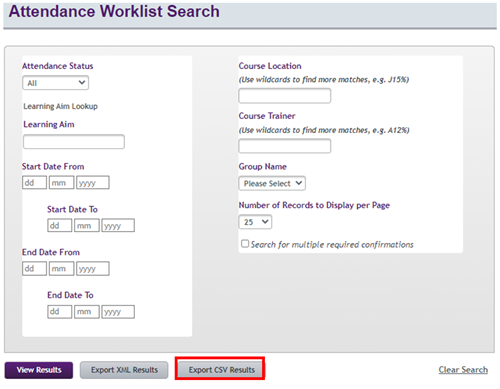
Learner data: attendance
- Go to the Application Information Service tab.
- Select Attendance Home and then Attendance Worklist.
- Set the parameters (such as attendance status and period) for your report.
- Select Export CSV Results.
- The upper part of the page will darken. Scroll down to Results Export and enter a name for your export file.
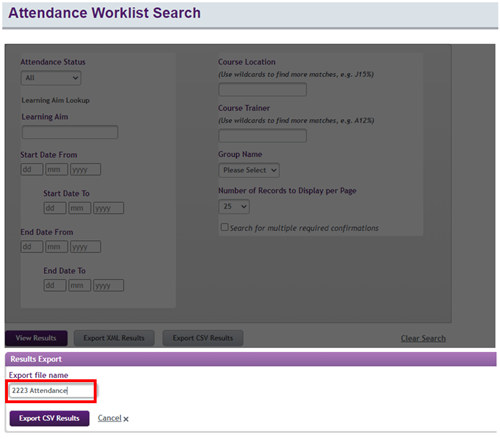
- Select Export CSV Results to generate the export file in csv format.
Step 2: Manipulating the csv download file in Excel
When you select the downloaded export file, it should automatically open in Excel.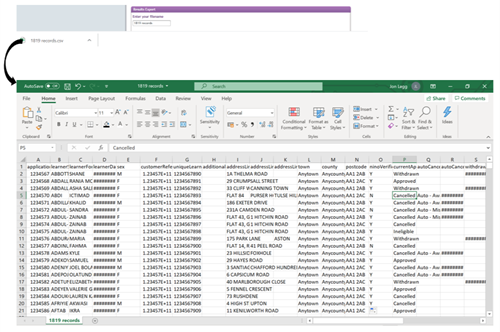
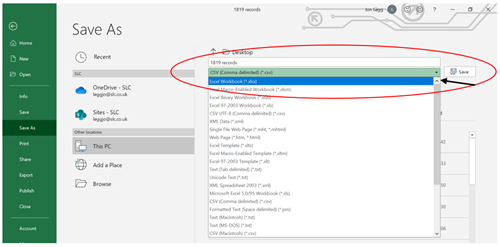
Files in csv format impose some restrictions, for example you cannot password protect them. As a first step, we therefore recommend that you save the file as an Excel workbook. This will let you fully manipulate it.
You can make the file easier to read by resizing the columns.
- Select the top left-hand corner to highlight all the rows and columns.
- Double click on one of the dividing lines between the column labels to resize the columns.
You can then use Excel functions such as filter and sort to manipulate the data as needed.
You can find more information about using Excel on the Microsoft website. You can also search for the latest Microsoft Excel tutorial videos on YouTube.